
Section 1.3.2 - Connecting To Your Gemini
NOTICE: Make sure that you have connected the hub's focuser port to the Gemini's focuser port and the hub's rotator port to the Gemini's rotator port. Although it is difficult to damage the Gemini by switching the lines it is best to avoid this problem.
Once you have installed your Gemini Commander software, the next step is to connect your hub to your computer. These instructions will help you connect over an RS-232 Serial connection using the Serial-USB cable included with the Gemini controller hub. For instructions on connecting and configuring over other types of connections, please consult the Configuring Software section of the Gemini manual.
To establish a serial connection using Gemini Commander:
- Plug In Your Gemini Hub - Plug the universal 12VDC power supply into a wall outlet using a locally compatible power cord. Insert the 2.5mm x 5.5mm plug into the 12VDC power port on the Gemini control hub and move the slide switch up to turn on the Gemini hub. The LED power indicator will light after a few seconds to indicate the boot sequence was successful.
- Connect the Serial-USB Cable - For serial communication, connect the RJ12 plug into the Gemini socket labeled "Serial" and connect the USB-A plug into an open USB port on the PC computer.
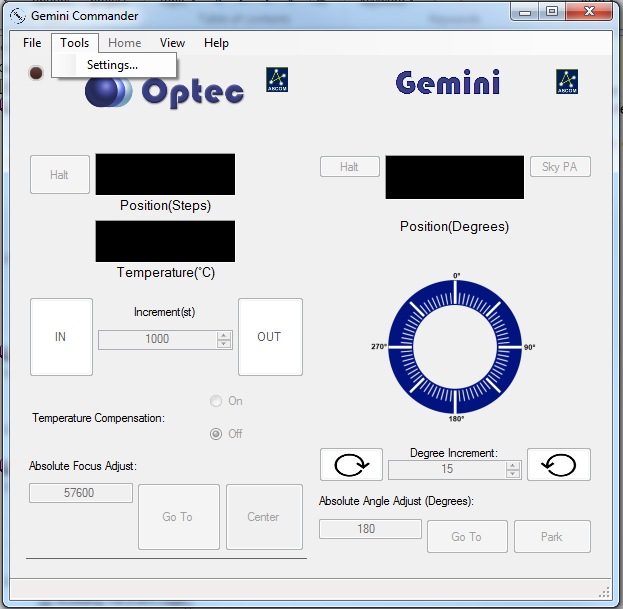
- Go To The Setup Screen - Open Gemini Commander and go to the Tools menu. Choose the Settings option. The setup screen will open, note that this screen is a separate client. The Setup Screen will appear in the upper left screen - If not initially visible, check the task bar for the second Gemini instance. If you wish to leave the setup screen at any time without changing any settings, click the OK button at the bottom of the window.
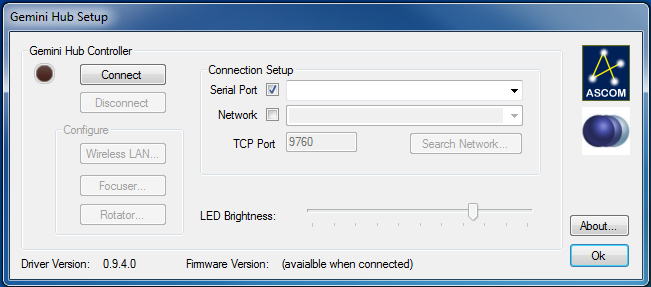
- Connect To The Hub - For serial communication, select the Serial option in the Connection Setup section and use the Com Port drop-down to select the appropriate communications port. This drop-down list will display only active serial ports so the virtual com port (VCP) assigned to the Serial-USB cable should be easy to identify. Next click the Connect button. If the LED indicator next to the Connect button does not light or if you receive an error, try selecting a different serial port in the Com Port drop-down list. If you encounter persistent problems determining which COM port to use, contact Optec Technical Support for assistance. You will see the Firmware version update when the connection is established. If you wish to connect via the Ethernet or WiFi check the network box and click search network. After several seconds you should be able to select the Gemini's IP address from the drop down box.
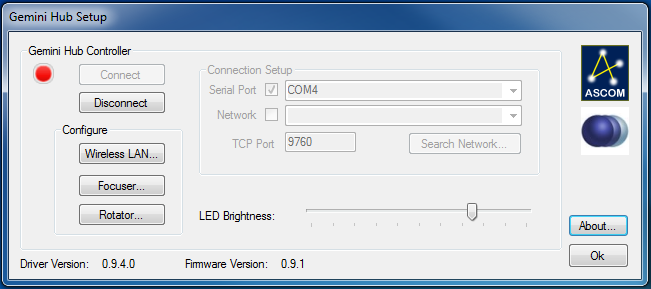
- Adjust LED Brightness - if you find the focuser hub's power indication LED adversely affects your night vision, you may adjust its brightness with the LED Brightness slider. The range of brightness varies from left to right, starting with no light at all and moving to full brightness. You have to be connected to adjust the LED brightness.
- Configure the Focuser - In the Configure box click on Focuser. You should see this menu appear:
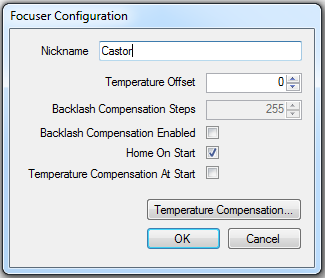
This will allow you to adjust many of the focuser's features. Several features are factory defaults and can not be adjusted.
- Configure the Rotator - In the Configure box click on Focuser. You should see this menu appear:
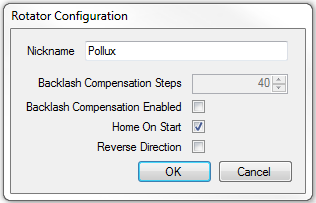
This will allow you to adjust many of the rotators features. Several features are factory defaults and can not be adjusted.
- Connect To The Hub Via WIFI - Connect your computer to the GeminiConfig WiFi network that is auto-generated by the hub. In Gemini Commander, verify that the Connection Setup selection is set to WiFi and the IP Address setting has been auto-filled (if it has not, then click the Refresh IP's button to try again, then click the Connect button. If the IP address that is auto-filled is incorrect, contact Optec for support.
-OR-
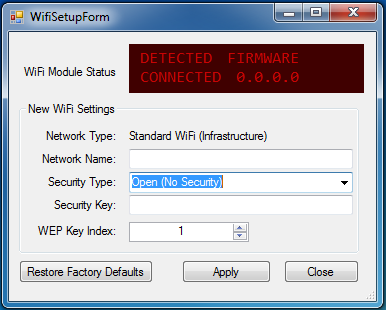
- Connect To The Hub Manually - Connect to the hub via serial or Ethernet, then click the Wireless Lan button. Current WiFi configuration information will be displayed. If at any time, you wish to restore the hub's WiFi settings to default, click the Restore button.
- Enter A New Configuration - Enter a network name, security type, security key (if necessary), and WEP Key Index (if necessary) that matches the Wi-Fi network to which you want to connect.
- Confirm Your Changes - Click the Apply New Settings button to connect to the new network. Allow one to two minutes for the hub to reconnect. A message will be displayed to confirm your changes. Click the Close button to exit this window.
- Connect To The Hub - Connect your computer to the Wi-Fi network that you entered information for above. Verify that the Connection Setup selection is set to WiFi and the IP Address setting has been auto-filled (if it has not, then click the Refresh IP's button to try again, then click the Connect button. If the IP address that is auto-filled is incorrect, contact Optec for support.
- Confirm Connection - The red LED simulation should turn on, indicating that the connection has been established.


