Network Access any Optec Device using a Raspberry Pi!
Introduction
Sometimes you would like to be able to connect remotely to a device, either over ethernet or WiFi. However, not all devices support ethernet or WiFi natively. Phones may not be able to directly connect to a device via USB or Serial. This article demonstrates how to use an Optec ThirdLynx (or any other Optec product with an Alpaca Driver) over the network using a Raspberry Pi to host the driver. It will show configurations for when there is an existing network and how to configure a new WiFi network from the Raspberry Pi.
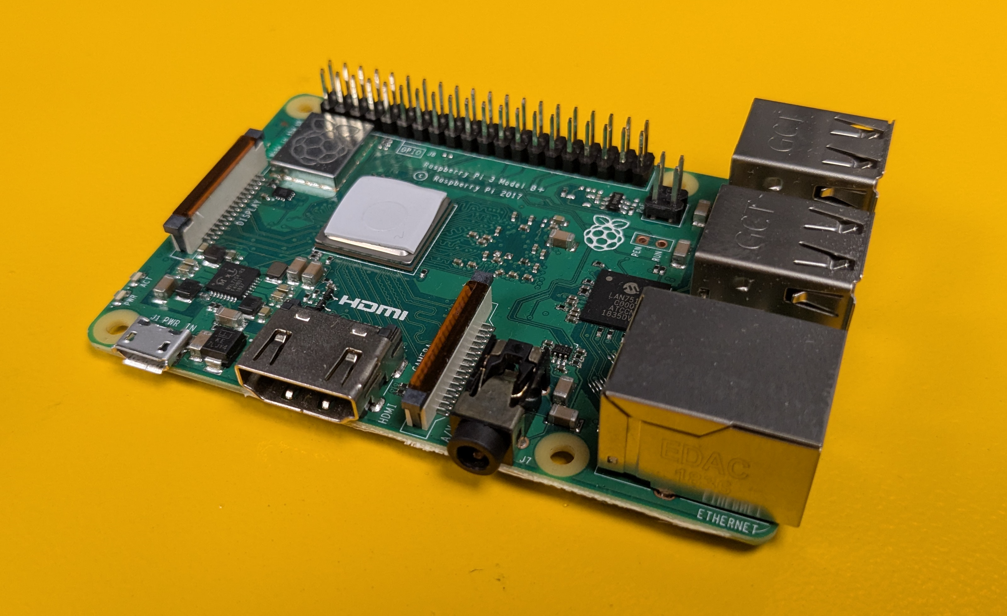
The examples use a 2GB Raspberry Pi 4. It was also tested with a Raspberry Pi 3 and a Zero 2 W, and should work with any Raspberry Pi 2+ as well as most other Single Board Computers. Many of the same steps also apply to other computers running Windows, Linux and macOS using the native Alpaca Driver.
Step 0: Required Materials
To build a similar system you need a Raspberry Pi (arm7hf+ CPU which means the Pi 2 minimum, with the Pi 3 and above with WiFi is recommend), power supply, and a micro SD card. It’s also recommended that you have a USB Card reader, monitor, keyboard and mouse, and an ethernet cable or WiFi for initial setup.
Step 1: Initial OS Installation
First the Raspberry Pi operating system needs to be installed and configured. Raspberry Pi Imager can download it automatically but if you are making several Pis or may need to setup with slow internet you can download the latest version of Raspberry Pi OS from Raspberry Pi directly. The best version to use is the Desktop with Recommended Software. The 32-bit version can be used for all Pis with less then 8GB of RAM because they do not have enough ram to benefit from the 64-bit version. The lite version can be used as well, but the UI can be useful for people who don’t want to do everything from the terminal.
Configure and flash the OS onto the MicroSD card using Raspberry Pi Imager. You can either select an OS version from Imager or select one you already have downloaded. Use a version that is fairly up to date to avoid lengthy updates. After clicking NEXT you can optionally customize your image. For this project it is recommended to set the hostname to something like alpacapi so it can easily be found. The username / password and location can also be set at this time. If you are going to use the Pi as an access point don’t connect to WiFi, if you have a WiFi network in your observatory you can upload the settings to connect to it here.
After choosing the settings flash the MicroSD card. This can take a few minutes so it’s a good time to take a break.
Once the MicroSD card is ready you can insert in and boot your Pi. Follow any onscreen instructions to get it fully set up.
Step 2: Initial OS Setup
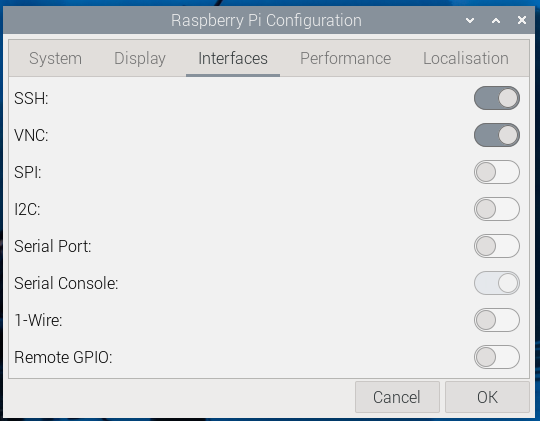
After the initial setup it is recommended setup some way to remotely access the Pi. You can also use VNC, Raspberry Pi Connect, SSH, or a program like TeamViewer. Because VNC is built in it may be the easiest to setup and use. To activate VNC open the Menu -> Preferences -> Raspberry Pi Configuration and open the Interfaces Tab.
Note
You may want to set your localization from the Configuration Tool as well.Next update the Pi from the terminal with
sudo apt update
sudo apt upgrade
and, after the updates are complete, reboot.
After the Pi has rebooted open a terminal and enter the command hostname -I to find the IP Address(es). Note what the address is. You can use the address and a remote access solution to connect to the Pi. Once you are connected remotely to the Pi you don’t need a monitor, keyboard or mouse attached.
Note
You may want to force a screen resolution if you want to access the Pi without a monitor.You can also use the new Raspberry Pi Connect service for offsite access.
Step 3: Alpaca Driver Setup
Now that the OS is ready the next step is to install Alpaca driver. For the ThirdLynx (or any other Lynx family focuser) that is the FocusLynx Alpaca driver, but it should be the driver for whatever device you are using. Go to the Optec Website and select Downloads. From there select Focusers and FocusLynx. For a 32-bit ARM OS use the FocusLynx Linux Alpaca Driver (armhf) driver, otherwise make sure to use the build that matches the OS. After downloading the driver extract the AppImage. It is recommended to move it to folder in the home directory, for this demo a folder called Drivers was created.
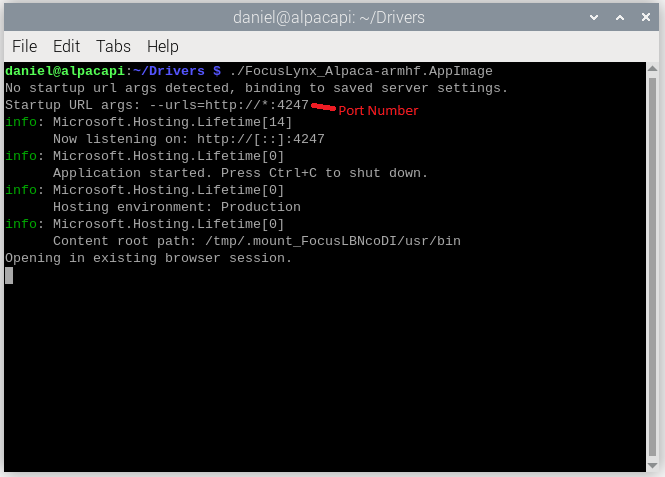
After extracting and moving the driver run the driver from the terminal to check for any issues. After changing the directory where the driver is located run it with ./FocusLynx_Alpaca-armhf.AppImage
Note
For versions before 3.3.5 you may need to install libfuse2. Newer driver builds don’t need this.If there are any missing dependencies there should be a list here. If the driver isn’t set as an executable you can mark it as executable with chmod +x FocusLynx_Alpaca-armhf.AppImage.
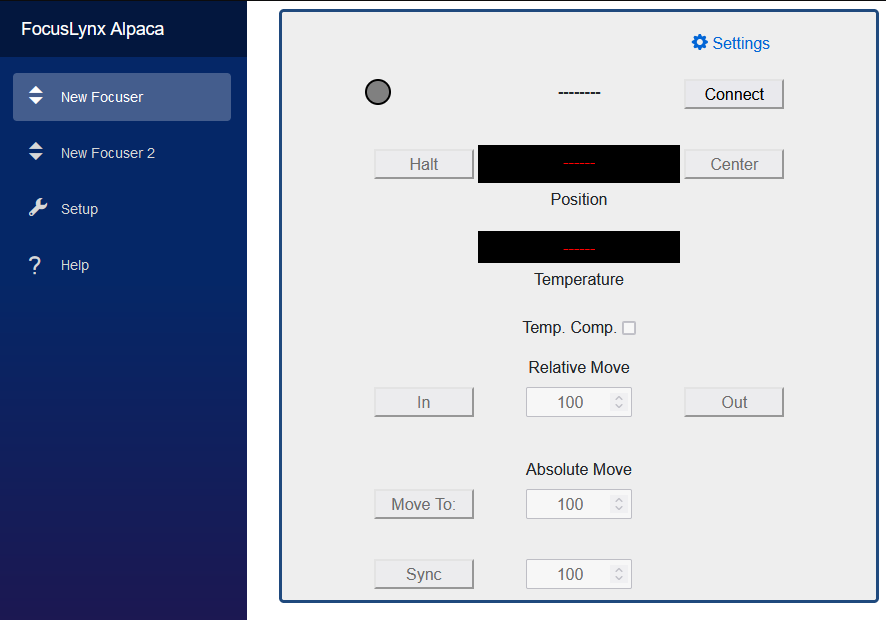
The Alpaca control page should launch in a browser. By default this page is accessible from the Pi, or from any other device on the same network. From the browser on your local computer navigate to the Pi’s IP Address and the port the server is running on. You can find this in the terminal (marked in the screenshot) or from the URL of the control page. The Lynx driver uses port 4247 so in this case the IP and Port is 192.168.1.121:4247, but make sure to use the IP Address for your Pi. You may want to bookmark the control page.
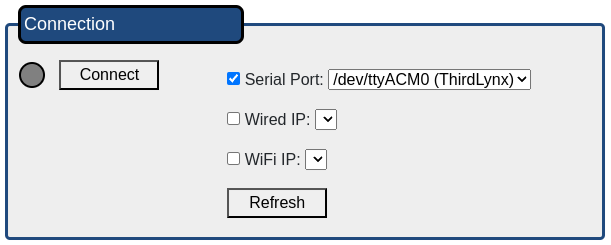
To connect to the ThirdLynx the driver needs to know the COM Port. Click on settings from the upper right of the control page. From the Serial Port drop down select the ThirdLynx option. It is probably something like /dev/ttyACM0 (ThirdLynx). Then press Connect. The driver should connect to the Pi and update the settings and the name of the device should change to match your focuser.
Note
Modern Pi OS images give you serial access by default but if you get a permissions error you may need to add your user to the dialout group.Now you can select the renamed focuser on the left side of the screen. On the homepage you can see the position and temperature and move the focuser. If you have an Alpaca Client like ASCOM Platform 6.6+ on the same network you can connect and use the focuser. There will be a follow up article and video showing how to set this up.
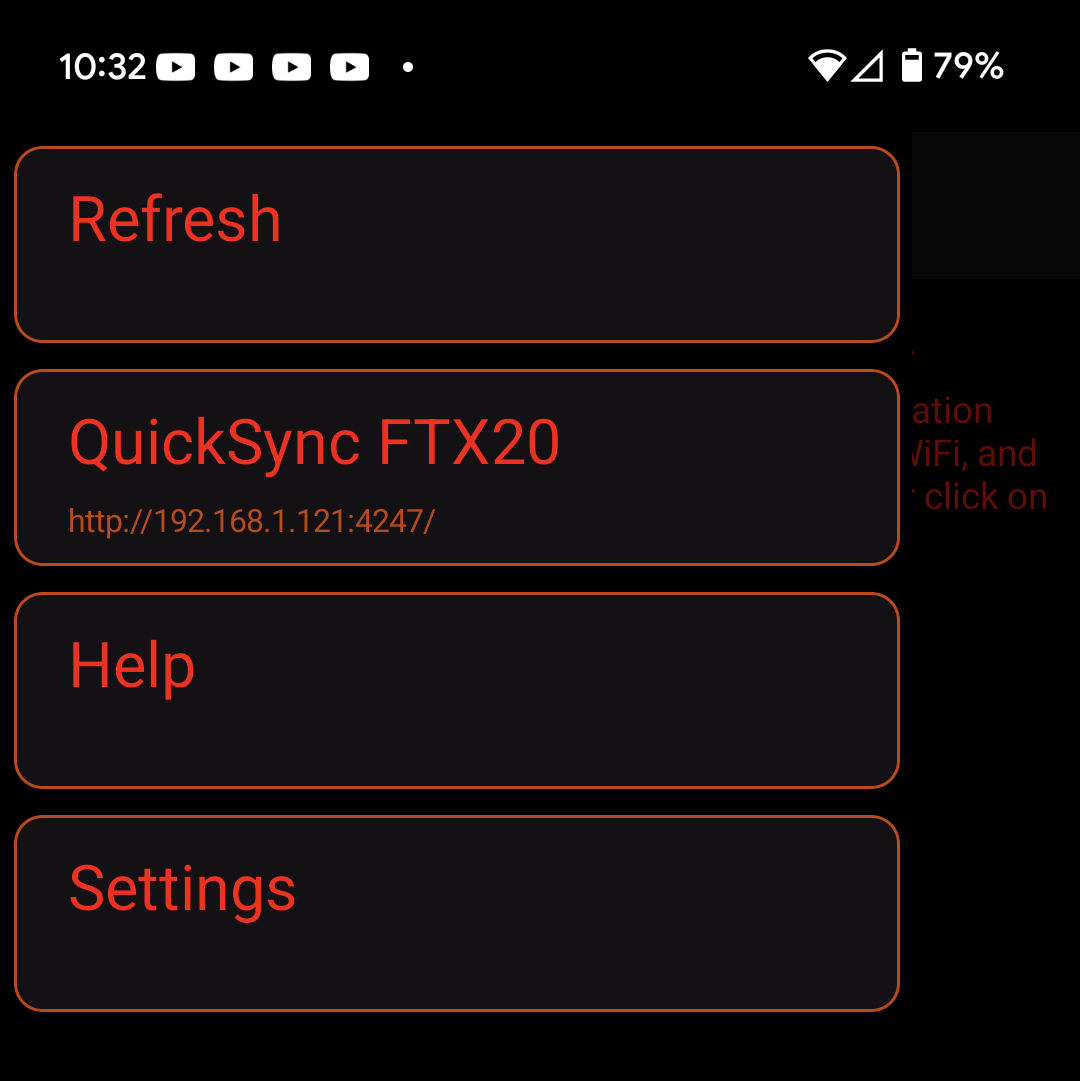
If your Raspberry Pi is on the same network as your phone you can connect it from the Optec Remote App
or directly via a Web Browser using the same IP Address and Port.
Step 4: Starting the driver on boot
This requires you to remotely access the Pi and run the driver before you can connect to the focuser. It would be more more convenient if the driver starts when the Pi boots, that way no manual action is required to use the Pi. There are a few ways to do this, this article shows how to use systemd. For some other options see this SparkFun tutorial.
To use systemd there needs to be a service file, for this call it lynx.service. This file can be created with
sudo nano /lib/systemd/system/lynx.service
Next the service needs to be defined. This requires adding the following text to the file:
Note
Make sure to put your own username and driver instead of daniel and the FocusLynx driver[Unit]
Description=Run FocusLynx Driver on Boot
After=multi-user.target
[Service]
ExecStart=/home/daniel/Drivers/FocusLynx_Alpaca-armhf.AppImage
[Install]
WantedBy=multi-user.target
Use ctrl x, y for yes, and enter to write out the file and save it.
Next systemctl needs to reload the service and enable it. Use the following commands:
sudo systemctl daemon-reload
sudo systemctl enable lynx.service
After starting the service reboot the Pi. Once the reboot is complete the driver can be accessed on the same IP Address and Port as before. The browser won’t open automatically on the Pi but you can access the UI with the IP Address and Port in your browser. Alternatively running the driver program again will re-open the browser.
Note
You may need to reselect the COM Port in the driver one time after enabling autostart as the settings file is stored in a user directory and the user that is running the driver has changedStep 5: Use the Pi as an Access Point
So far this assumes that your Pi is on the same existing network as your computer and phone but what if you don’t have a network in the field? Fortunately, the Raspberry Pi can act as a WiFi Access Point. You can do this either through the GUI for newer versions of Raspberry Pi OS or via the terminal. This example will show you how to configure this through the GUI. A good example of setting this up via terminal can be found on the Raspberry Pi Forum.
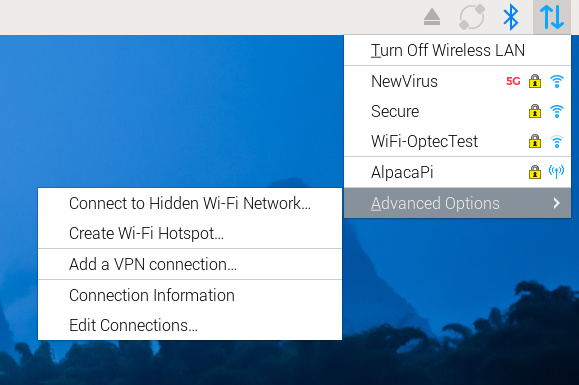
First click the Network Icon (it will be a WiFi symbol if connected to WiFi) on the Raspberry Pi task bar.
Note
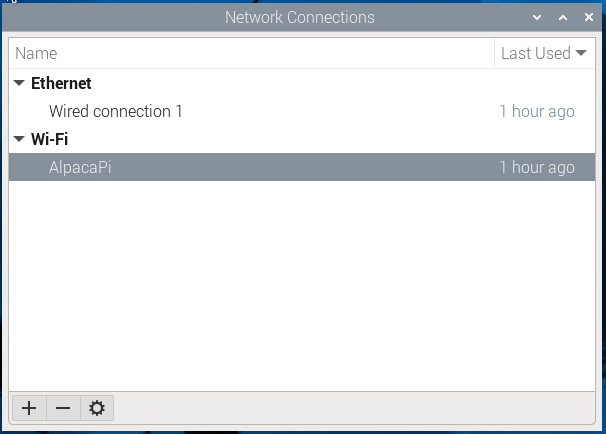
If you haven’t already set your WiFi Country you will need to do that here.Next, select Advanced Options and Create WiFi HotSpot. Give it a name, for example AlpacaPi, and (recommended) a password. The WPA and WPA2 option is good choice for security and accessibility. The HotSpot network also needs to be configured to start on boot. Click on the Network Icon -> Advance Options -> Edit Connections.
Select your HotSpot and click the gear icon.
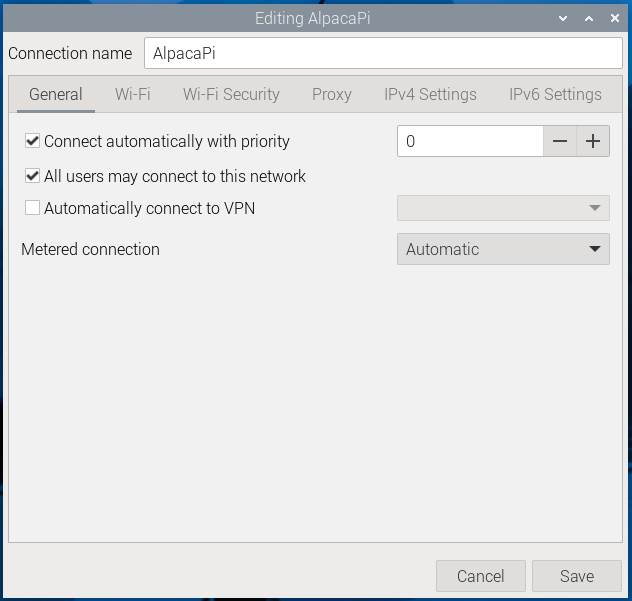
Under the General tab select Connect automatically with priority and click Save. Your network should now start on reboot.
Now you can connect your phone or computer to the new network. Scan for your new WiFi Access Point.
Note
Some phones do not like connecting to Access Points without Internet. You may need to temporarily disconnect from cellular data to connect to a device.After connecting the IP Address of the Pi will have changed. You will need to rerun the App Discovery or Alpaca Discovery to set up the new connection. After connecting and finding the new address you can run the ThirdLynx via WiFi or Ethernet anywhere! You can take this into the field and you should have all your connections set to activate on boot.
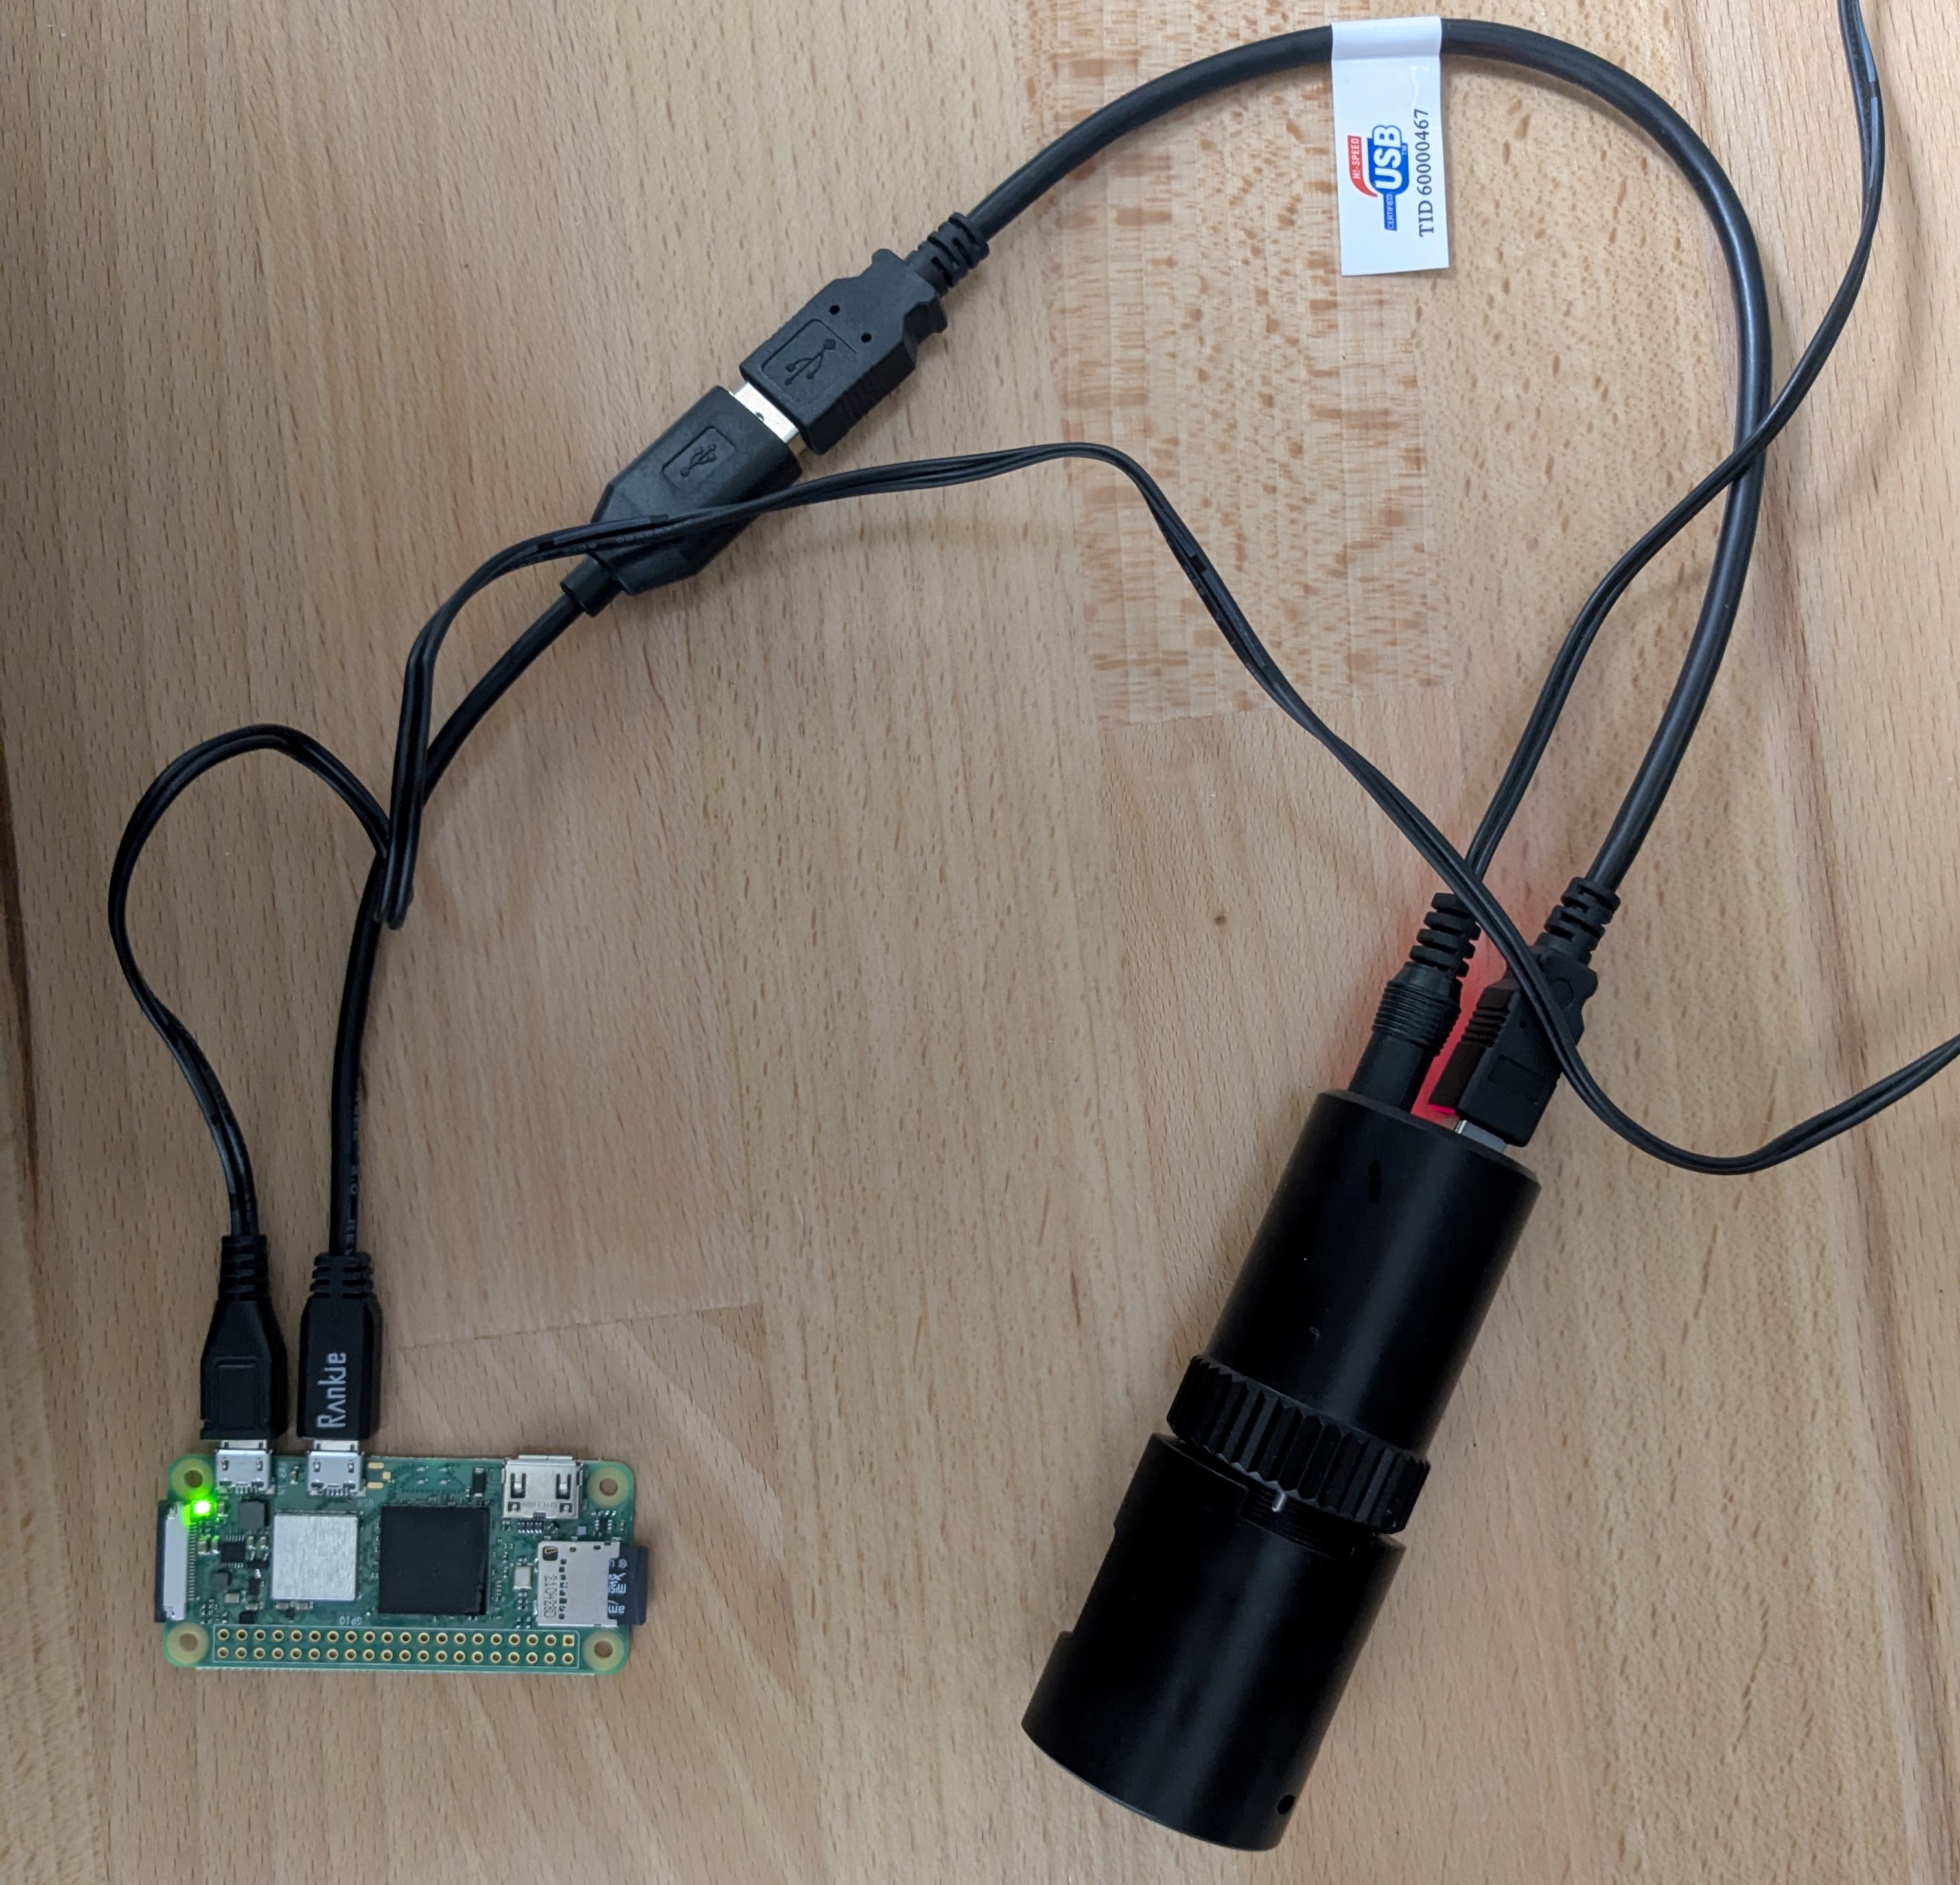
If you only have a single device to automate the Raspberry Pi Zero 2 W is great for adding WiFi. At 15 dollars it is a very cheap solution.
There are a few extra things you can do for quality of life. One is using a tool to backup your MicroSD card. If you are using an existing network you may want to set a Static IP for the Raspberry Pi or add a reservation to your router’s DHCP table. That way the IP Address of the Pi won’t change. This is specific to the operating system or router you are using so some research may be required.
